The LG C6 OLED is one of the best mid-range OLED TVs you can buy right now. After spending the past month testing and using it every day, one thing became clear: straight out of the box, you’re leaving picture quality on the table.
The good news is that getting more out of the TV doesn’t require professional calibration or hours spent digging through menus. A handful of small adjustments can make movies look more cinematic, improve shadow detail, smooth out motion and even make the built-in speakers sound noticeably better. Here are the exact settings I’ve been using after living with the LG C6.
Start with the right picture mode
The C6 includes several picture presets, but if you’re watching movies or TV shows, Filmmaker Mode is easily my top recommendation. It disables unnecessary image processing and presents content much closer to how filmmakers intended, making it the mode I kept coming back to throughout my testing.
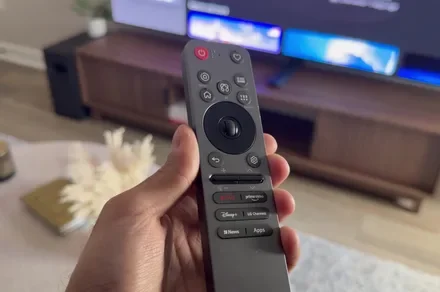
Switching to it only takes a few seconds. Press the Settings button on the remote, open the Quick Menu, navigate to Picture Mode, and select Filmmaker Mode.
Faiz Aly / Digital Trends
While this is a great mode but it doesn’t necessarily make it the best option for every situation. If you usually watch during the day or simply find Filmmaker Mode a little too dim, Cinema and Cinema Home are the two presets I’d recommend instead. Both preserve the excellent color accuracy and contrast while adding an extra boost in brightness that’s especially helpful in brighter rooms.
Faiz Aly / Digital Trends
Sports are the one exception. Standard mode’s slightly cooler color temperature suits live broadcasts particularly well while also adding a little more perceived brightness, making it my preferred choice for sports and daytime viewing. The same applies if you’re streaming movies or TV shows during the day and want a brighter image without moving too far away from an accurate presentation.
Turn on Filmmaker Mode Ambient Light
If you’re using Filmmaker Mode, there’s another setting that’s well worth enabling. It’s called Filmmaker Mode Ambient Light, and it automatically adjusts the TV’s brightness based on the lighting in your room. During the day, it brightens the image, while darker rooms get a dimmer, more comfortable presentation without you having to make manual adjustments.
You’ll find it under All Settings > Picture > Brightness > Filmmaker Mode Ambient Light.
Faiz Aly / Digital Trends
There’s one important limitation to keep in mind. This feature only works when you’re using Filmmaker Mode with HDR and Dolby Vision content, so don’t expect it to affect every picture mode or source.
Fix raised blacks and improve shadow detail
One of the biggest improvements I noticed during my testing came from making three small adjustments to the brightness controls.
In certain darker scenes, black areas occasionally looked slightly lifted, making them appear more gray than deep black. It wasn’t something I noticed in every movie or TV show, but whenever it did happen, these changes consistently made the picture look richer and more natural.
Faiz Aly / Digital Trends
Head to All Settings > Picture > Advanced Settings > Brightness to find the controls.
The first adjustment is Contrast. It’s the second option in the menu, and I reduced it from the default value to 95. That small change helped reduce some of the overly bright highlights without sacrificing the image’s overall punch.
Next, go back one menu and lower Black Level from 50 to 49. It may seem insignificant, but reducing it by just one point noticeably cut down the raised black effect I was seeing in darker scenes.
Faiz Aly / Digital Trends
The final adjustment is Near Black Detail. By default it’s set to 0, but changing it to -1 gave darker scenes a deeper, more natural look by prioritising richer black tones.
Picture settings always come down to personal preference, so don’t be afraid to experiment a little. The key is to avoid making dramatic changes. Instead of jumping from 0 to -20, try moving a setting one or two points at a time. Adjustments like -1, +1 or +2 can make a surprisingly noticeable difference without throwing the overall picture out of balance.
Improve motion without the soap opera effect
Motion handling is one area where I’ve consistently found LG OLED TVs can benefit from a quick adjustment, and thankfully it only takes a minute to change.
Faiz Aly / Digital Trends
Head to All Settings > Picture > Advanced Settings > Clarity > TruMotion and switch the setting to Cinematic Movement. During my testing, this delivered noticeably smoother motion while avoiding the artificial soap opera effect that nobody wants.
Faiz Aly / Digital Trends
If sports are your primary focus, Cinematic Movement still works well, but I usually switch to Natural instead. It kept fast-moving action looking smooth without introducing distracting motion artifacts, like ghost trails following a basketball or hockey puck. It’s a small change, but one that made live sports look much cleaner during my time with the TV.
Improve the built-in sound
LG simplified some of its sound presets in webOS this year. Unfortunately, that also meant losing one of my favourites: Cinema sound mode.
Thankfully, there’s a really solid replacement. AI Sound Pro consistently delivered the best balance of dialogue clarity, fuller sound and a noticeably wider soundstage during my testing, making it the preset I kept coming back to.
Faiz Aly / Digital Trends
You can enable it by opening the Quick Menu, selecting Sound Mode, and choosing AI Sound Pro.
If you’re relying on the TV’s built-in speakers rather than a soundbar or home theatre setup, this is easily the sound mode I’d recommend using.
Final thoughts
Those are the settings I’ve personally settled on after spending the past month testing the LG C6 OLED. None of them are particularly complicated, but together they noticeably improve the overall viewing experience, from more accurate picture quality and better shadow detail to smoother motion and fuller sound.
These recommendations aren’t exclusive to the LG C6. Many of them also work well on other LG C-Series OLED TVs, making them a great starting point before fine-tuning the picture to suit your own viewing environment and personal preferences. Picture settings will always come down to personal preference, but the great thing is that none of these changes are particularly complicated. Together, they noticeably improve the overall viewing experience.