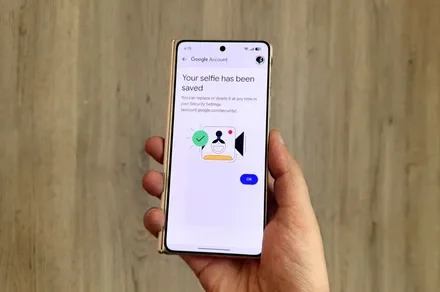
Losing access to a Google account is rarely a quick fix, but Google has been actively working to make things easier. Last year, the company introduced a feature called Recovery Contacts that lets you designate a trusted friend or family member to verify your identity if you ever get locked out. Now, Google has introduced a new option, one that uses your face to get you back in instead of a phone call to a friend.
Like Recovery Contacts, the new selfie video authentication feature requires some setup before you can use your face to sign into your Google account. This involves recording the reference video that Google will use to verify your identity whenever you attempt to log in this way. Here’s how to set up selfie video sign-in for your Google account.
Add a selfie video to your Google account
Before you get started, make sure your device has an active internet connection, and you’ve allowed camera access on your device or browser. You’ll also have to remove sunglasses, masks, or hats so your eyes, nose, and mouth are clearly visible, and make sure there are no other people or images of faces in the background. Once you’re ready, follow these instructions to enable selfie video sign-in:
Step 1: Open the Google app on your phone, tap your profile icon in the top-right corner, and select Manage your Google Account. Sign in if prompted.
Step 2: Select the Security and sign-in option, scroll down to the “How you sign in to Google” section, and select Selfie video. If it isn’t listed, look for a “Selfie video” chip just below the list, under “You can add more sign-in options.”
Step 3: On the next page, tap Continue. You’ll then see an explanation of how the feature works, how to manage your selfies, and how they’re processed. Tap I agree to move on to recording your video selfie.
Step 4: The next page lists a few tips for capturing your selfie. Follow these closely so the process doesn’t fail. Tap Next when you’re ready to take the selfie, select Start, and follow the on-screen instructions.
Step 5: Once you’re done, Google will verify your selfie, which can take a few moments. You’ll then see a confirmation that reads “Your selfie has been saved,” along with a note that you can replace or delete it anytime in your security settings. Tap OK to finish.
You’ll be automatically redirected to the Selfie video page within the Security and sign-in settings, which will now show the selfie you just took with a verified badge and a button to delete it whenever you want. If you’d rather complete the setup on desktop, head to myaccount.google.com/video-verification and follow the same steps as above.
Selfie video sign-in gives you one more quick and easy way to get back into your Google account when your password or secondary device isn’t an option. Setup takes only a few minutes, and you can remove your selfie at any time if you change your mind. Note that the feature isn’t available on Workspace accounts, child accounts, or accounts enrolled in the Advanced Protection Program, so won’t see the Selfie video options in your account if it falls into one of those categories.
If you’re interested in learning how the feature works, including how Google processes and stores your selfie video, you can find the details in Google’s official announcement.