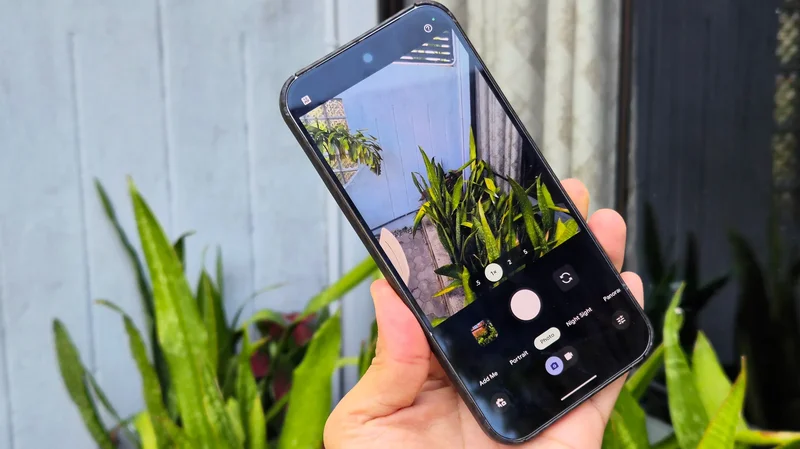
The Google Pixel has long been hailed as the king of point-and-shoot photography, but after years of covering the ecosystem, I have realized that relying solely on Auto mode is leaving some of the hardware’s best potential on the table.
While Google’s computational photography does the heavy lifting, a few buried toggles and manual adjustments can be the difference between a great snapshot and a professional-grade image.
After diving deep into the latest updates and fine-tuning my own device, I have found a specific set of configuration changes that improved my results.
Enable RAW images
You'll find a goldmine of metadata information
For a long time, I just let the Pixel do its thing, but if you want to take your editing seriously, the JPEG-only shots don’t cut it.
To flip the switch, I head into the Camera app, tap the Settings gear in the lower-left corner, and enable RAW/JPEG control.
Now, when I’m shooting, I can quickly tap the Settings icon in the viewfinder and choose to save a RAW version alongside a standard JPEG. It’s a simple toggle that doubles the utility of every shutter press.
Google’s JPEG processing is world-class, but it’s a finished product. When I tried to pull details out of deep shadow or recover a sky that was just a bit too bright, the JPEG would start to break.
By enabling RAW, I’m capturing the uncompressed data straight from the sensor. It often looks dull and flat compared to the processed JPEG, but it’s a goldmine of information.
I did this because I wanted the freedom to decide exactly how the shadows should look and the precision to adjust my white balance without ruining the image quality.
Enable grid type
Line up your subject before pressing the shutter button
Sometimes I look at my shots on a larger screen and realize my horizons were slightly tilted or that my subject was awkwardly centered in a way that felt off. That’s why the 3x3 grid has become the one setting I never turn off.
It’s a quick fix that lives right in the main interface. I just tap the Settings icon in the lower-left corner of the camera app, select More settings, and scroll down to the Composition section. Under Grid type, I select 3x3.
Immediately, the viewfinder is divided into nine equal rectangles that give me a clear visual map before I ever press the shutter.
Instead of putting my subject dead-center — which can often look static — I now align the interesting part of my photo. Overall, I stopped taking snapshots and started actually composing my images.
Set up Quick Tap to launch the camera
Capture fleeting moments without fumbling with your camera
There is nothing more frustrating than missing a perfect, fleeting moment.
While the double-press of the power button is a classic shortcut, I have found that the Quick Tap gesture on the back of the Pixel is the real camera-ready secret.
You can head into Settings > System > Gestures > Quick Tap to start actions > Open app, and tap the Settings gear next to it to choose the Camera.
Now, all it takes is two firm taps on the back of my phone, and the viewfinder is open before I have even fully raised the device to my face.
By the time I have pulled my Pixel out of my pocket, those two taps have already bypassed the lock screen and fired up the sensor.
It shaves off those crucial one or two seconds that usually make the difference between capturing a memory and capturing a blur of motion.
Tweak brightness, shadows, and white balance
Edit photos before pressing the shutter button
One of the most powerful things about the Pixel camera is that you don’t have to wait until you are in the editing room to start developing your photo.
For a long time, I let the AI decide exactly how bright a scene should be or how warm the light looked. But I have since moved to using manual sliders right in the viewfinder.
It’s quite intuitive, but easy to miss if you are used to just tapping to focus. When I’m framing a shot, I tap my subject, and three sliders pop up: brightness and shadows on the right, and white balance on the left.
I can slide them up or down with my thumb to see the changes reflected in real time before I even take the photo.
Switch on speech enhancement
Filter out background noise
One of the frustrating things about recording video outdoors is when a perfectly good clip is ruined by traffic noise, wind, or a loud air conditioner in the background.
While the Pixel has always had decent mics, I have started relying on the Speech Enhancement toggle to make sure my voice actually cuts through the chaos.
There is a limitation, though. This feature works only when you are shooting at 24 or 30 fps. If you have bumped your setting up to 60 fps for that smoother motion, the option will be greyed out.
The perfect Pixel camera setup
Overall, the Pixel’s computational power is incredible, but it shouldn’t limit your creativity.
By taking five minutes to step beyond the default ‘point-and-shoot’ mentality and adjusting these key settings, you are moving from letting the software make every decision to actually directing the shot yourself.
Whether it’s the added flexibility of RAW files or the precision of the framing grids, these small tweaks add up to a more capable camera in your pocket.
So, what are you waiting for? Give these changes a try on your next outing and see the results yourself. While you are at it, don’t forget to tweak these Pixel UI settings.