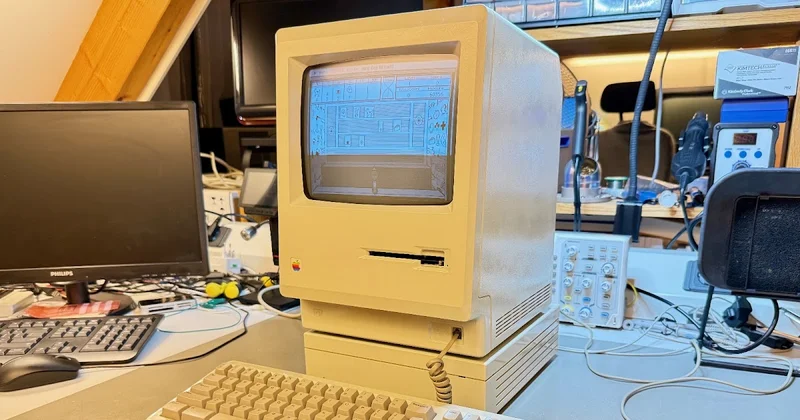
After a long pause of a year and a half, I finally managed to complete a modest new restoration project this summer.
The goal this time was to restore an original Apple Macintosh 128K (1984) for display and daily use in an office environment, where it will serve both as an educational curiosity and a source of entertainment and relaxation for employees.
However, there is a hidden contradiction in this double purpose—educative historical significance and entertainment capabilities—that pose a challenge: the original 128K Mac, while a major technical accomplishment for the time, wasn't actually useable. Its memory was far too limited for any meaningful application, given that the bitmapped display and fairly sophisticated operating system—for the time—occupied most of the 128KB. It also came with just a single 400KB floppy disk drive. Worst of all, it couldn't be expanded with extra memory or a hard-disk drive, so very little could be done with it as far as entertainment goes.
While later Macs addressed all of these limitations, they don't have the appeal and historical significance of the very first one, which translates into an impasse: should I go for historical significance or the ability to actually do something with the device?
Luckily, a compromise was possible: I sourced an original Macintosh 128K from 1984 that the original owner upgraded to a Macintosh Plus in 1986. The resulting machine is still a vintage original, but also has 1MB of memory and a SCSI port. Together, these features support a fairly extensive library of games that is more than sufficient for my purposes.
I sourced another CRT with hardly any burn-in, and used it instead:
In such cases, even when the caps are still within spec, soon they won't be. For a machine that is meant to be used daily for the next few decades, a recap is thus the first order of business. I used regular ESR caps (i.e., high-ESR for modern standards) on the power supply's secondary, to prevent a higher current inrush upon power up than this somewhat primitive circuit can cope with. I used low-ESR caps everywhere else for optimal response times.
As mentioned above, I also had to replace the battery compartment altogether, due to vintage battery leaks that led to severe corrosion.
And as can be noticed in the photo above, the epoxy potting of the flyback transformer was showing unambiguous signs of degradation (it becomes dark brown and brittle, as opposed to the original soft cream color), even though there wasn't yet any obvious corona discharge. See the close-up below, made after I removed the original flyback:
Once again, as this machine will be used daily in an office environment, replacing the deteriorated flyback before failure was a must. I did so using a new-old-stock unit of higher specifications and build quality than Apple's 1984 original.
Some impressions of the recapped board, with the new flyback and battery compartment already installed, are shown below.
Here's a close-up of the new flyback transformer, showing pristine epoxy potting:
—if they ever fail—fail open and don't cause short-circuits.
I then checked all semiconductors in-circuit, insofar as possible. None were obviously bad, but I preemptively replaced a few for durability. I started with the main switching transistor in the power supply (a C3153), which is one of the most stressed parts in the entire board.
I replaced it with a significantly higher-rated modern equivalent (a BU2525AF-PHI, rated for 800V, 12A and 45W), which also has the added advantage of having no conductive tab, thereby requiring no separate insulator between the transistor and its heatsink (in the original, the tab was the collector). I made sure to refresh the heatsink compound for optimal thermal conductivity.
Three other parts are known to be severely stressed in the original Macintosh's analog board; so much so that Apple replaced them with higher-rated parts in later revisions of the board: the two main rectifying diodes of the power supply unit, and the damper diode responsible for flyback spike suppression and beam scanning control.
The original main rectifying diodes were GI854, which I replaced with the much higher-rated 15SQ045 Schottky barrier rectifiers (rated for 45V instead of 40, and 15A instead of 3.3). Beyond being much more robust and durable, they will also run cooler and reduce heat stress in the surrounding circuitry.
And here are the retired components:
With the durability replacements out of the way, the next step is an absolutely necessary one: the Macintosh's power supply unit is a somewhat primitive switch-mode one without modern protection and safety mechanisms. The feedback part of the voltage regulation loop is implemented with an optocoupler, whose internal diode weakens over time. This can weaken the feedback and lead the power supply to 'think' that the secondary voltage rails are at a lower level than they actually are. It may then try to boost the voltage, effectively creating an overvoltage runway that can fry the entire digital board and write off your precious vintage Mac. That optocoupler must be replaced with a fresh new part (I used a 4N35, as shown in the photo below) and the power supply recalibrated again (the feedback mechanism is based on the 5V rail, so that is the one that must be recalibrated).
In the photo above, notice also that I added hot glue to the brightness potentiometer. Although I can't figure out why this is quite needed, I know that Apple did it in later revisions of the board. So, to be on the safe side, I did it too.
Finally, some of the larger, 1W resistors on the analog board had drifted over time, such as this one:
Here is the final state of the analog board:
I now moved to the digital board—the computer proper—which was in fairly good shape, as shown in the photo below:
I also added diode CR1, which Apple originally left unpopulated. This diode allows the SCSI port to carry 5V. Apple didn't use it because an external SCSI hard drive required a separate power supply unit anyway (a puny 5V rail can't get those platters to spin!). But since I am planning to replace the external hard drive with a modern solid state one (a BlueSCSI), adding CR1 allows me to dispense with an external power supply altogether, and power the BlueSCSI directly from the SCSI flat cable instead.
At this point, I installed the drive back into the machine to test it, only to realize that, although it was reading and writing disks correctly, the ejection mechanism wasn't working. This is a known point of failure in vintage Macs, so I knew exactly where to look: one of the gears in the ejection mechanism is made with a kind of plastic that deteriorates spontaneously over time; this has affected or will affect virtually every Apple vintage drive. Indeed, upon opening the ejection mechanism up, this is exactly what I found:
And below is the replacement gear for comparison. It's made with modern resin that won't deteriorate spontaneously over time:
The cases of all units (the computer itself, the keyboard, mouse, and external hard disk drive) were very yellowed, beyond retrobrighting. I thus prepared and resprayed them with automotive-grade 2K paint over an adhesion-promoting layer, using the closest RAL color to the original Pantone specification:
This new 2K coating is very hard and durable. It will protect the cases against UV light, dirt and mechanical scuffs for the next four or five decades. They will never yellow again.
Here are some impressions of the reassembly process:
Notice, in the first two photos above, that I used self-adhesive, automotive-grade fabric tape around the CRT's implosion band for extra protection.
Before closing the computer's case, I carefully calibrated the CRT: I re-centered it by manipulating the centering rings on the CRT's neck, and then secured their position with candle wax. I also adjusted horizontal and vertical widths, focus, and brightness through the onboard potentiometers. The final results are shown later in this post.
Next, I replaced the original SCSI hard disk drive with a solid-state modern BlueSCSI emulator. This is a concession to convenience, given the fact that this machine will actually be used daily. Vintage hard disk drives are far from reliable, and even the ones that still work are destined to fail with regular use.
I secured the BlueSCSI to the original case by using four nylon standoffs glued to the bottom of the case with two-part epoxy. The BlueSCSI can be removed by unbolting it from the standoffs. I also kept the original power supply—although it is disconnected and purely decorative—to prevent the power socket and on/off switch holes in the case from remaining empty, which would detract from the original look. Nonetheless, the BlueSCSI gets its power directly from the SCSI cable, not from the onboard power supply.
And it works too ;-)